A viral video has shown a creative way to repair a zipper. The simple technique has gained the attention of celebrities and people of all ages. If you have ever lost a zipper, you should learn how to fix it with a fork. The video also demonstrates how to paint the zipper teeth to keep it from falling off. Here are some easy steps to fix a zipper with a fork:
Repairing a zipper that fell off
Zippers can be a nuisance, but they’re also quite easy to repair. The first step in fixing a zipper that fell off is to release the fabric around the zipper. Then, take a needle and thread and stitch the ripped zipper back on the fabric. Be sure to cut the fabric around the zipper carefully so that you don’t cut the surrounding cloth. Next, hand stitch a new line of thread onto the zipper tracks. The entire process will take just five minutes, and will cost less than buying new clothing.
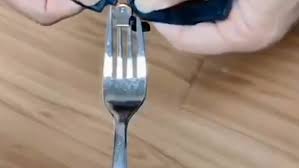
To begin, place the zip head on the prongs of the fork. The zipper teeth should line up with the mouth of the slider. Use leverage to pry open the zipper. To make it easier to pry open, use a fork or other tool that you can use as leverage. You can use a fork if you can’t use pliers or a sewing machine.
Putting a zipper back in clothing
If you have ripped the zipper from your favorite piece of clothing, you don’t need to spend a lot of time sewing it back in place. The key to repairing a ripped zipper is to cut the strands of thread near the bottom of the zipper track and hand-stitch them back into place. These steps can be done in under five minutes, and they’re much cheaper than purchasing a new piece of clothing.
If your zipper is stuck, you might have to pull it back in. The zipper pull might be stuck and isn’t working properly. There may be several reasons for this problem. The zipper teeth can have worn out, become too loose, or even break. If you can’t get the zipper to zip back in place, stop zipping it completely. Remove the clothing and examine the issue. If you’re unsure how to fix the zipper, try pulling it back in with your hand or use needle-nose pliers. Alternatively, you could use tweezers.
Painting the teeth
A simple way to lubricate the zipper’s teeth is by applying clear nail polish to the exposed zip teeth. The teeth of a zipper should be smooth and the slider should move easily. The teeth should not have too much glue on them, however. You should let the glue dry completely before you try to pull the zipper out. You may need to apply several coats. Once all coats are dry, test the fix by pulling the zipper out.
Next, you need to investigate the reason for the zipper sticking. To check whether the zipper is stuck, turn your clothing inside out and pull on the fabric. If it’s stubborn, use tweezers to pry it out. In some cases, the zipper may not be able to be fixed without lubrication. In these situations, the fork method may be needed.
Using fabric glue or super glue
If a zipper pull breaks, you can use a drinking straw to fix it. First, measure the length of the zipper. Then, cut the straw lengthwise. Use fabric glue or super glue to adhere it to the bottom of the zipper. Wait for the glue to dry. Then, reattach the zipper pull and it should work again. Once the glue dries, repeat the process to replace the zipper.
Alternatively, you can use fabric glue or superglue to fix a zipper. If you have some fabric glue or superglue lying around, you can use it to fix it. Remember to use the extra glue on the edge of the zipper tape for added support. After you’ve fixed the zipper, you can try the other tips mentioned in this article. You’ll be surprised at the results!