How to remove an image’s background on Windows 11: In Windows 11, the integrated photo-editing applications, Paint and Photos, offer users the capability to eliminate an image’s background or substitute it with a solid color, all without the need for third-party apps. Paint provides the option to erase the entire background and save images in PNG format for transparency. Users can also selectively remove specific portions of the background. On the other hand, the Photos app facilitates background removal and replacement with a solid color. Users can pick colors from a palette or input HEX or RGB codes for customization. After making edits, users can either apply the changes or reset preferences. The original image can be overwritten, or users have the option to save a copy of the modified image.
Microsoft’s famous PC platform, the Windows 11 operating system. Has built-in photo-editing applications like Paint and Photos application. These applications come with features that help users to remove a picture’s background or replace it with solid color without downloading another third-party application. Here’s a step-by-step manual on how to use Windows 11’s built-in Paint and Photos application to remove the background of an picture or to replace it with a solid color.
How to use Paint to remove an picture’s background
How to remove an image’s background on Windows 11. Windows 11’s Paint application can be used to delete the entire background of an picture and replace it with transparency.
However, users must to note that if they wish to save their photos with a transparent background. They need to keep the image as a PNG file. Other formats like JPG don’t support transparent pictures.
- Locate the image from which you want to delete the background.
- Right-click on the image and choose “Open With > Paint” from the context menu.
- Once Paint is open, navigate to the “Image” section at the top.
- Click on “Remove Background” (the icon with multiple lines and a person).
- Allow Paint to process and delete the background. This might take a moment.
- Once completed, you’ll see the edited image without its background.
- To save the image with a transparent background, choose the “File” option.
- Click on “Save” from Paint’s menu bar or use the shortcut Ctrl+S.
How to remove a portion of the background from an image
How to remove an image’s background on Windows 11. Paint also permits users to remove only a selected portion of the background from an picture. To do that:
- Open the image you want to edit with Paint on Windows 11.
- Click on the down-arrow icon in the “Selection” section at the top of the Paint window.
- Choose the “Rectangle” option. Note that the “Free-form” selection tool is not available as it disables Paint’s background removal feature.
- Use the rectangle tool to select the specific part of the image where you want to delete the background.
- Once you’ve made the selection, go to the “Image” section at the top.
- Choose the “Remove Background” option.
- Allow Paint to process and remove the selected part of the background. This may take a moment.
- After the background removal is complete, save the edited image.
- Click on the “File” option in Paint’s menu bar.
- Select “Save” or use the shortcut Ctrl+S.
By following these steps, you can effectively use the Paint app on Windows 11 to remove the background of an image using the rectangle selection tool.
How to replace an image’s background with solid color
Using Photos app on Windows 11:
- Open the image you want to edit with the Photos app.
- Open the Edit picture menu from the top bar (or press Ctrl+E).
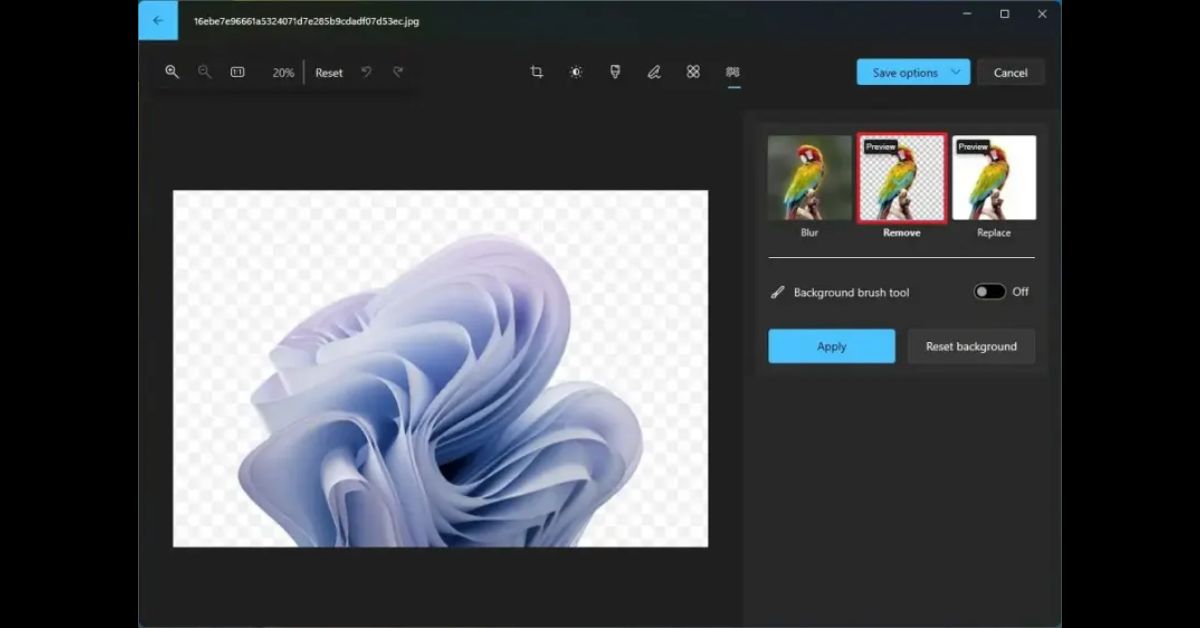
- Click on the background removal and replacement tool, denoted by the icon of a person with lines behind them.
- In the right pane, choose the “Replace” option.
- Select the color to fill your image’s current background from the color palette. If you know a color’s HEX or RGB code, you can enter those values in the given boxes for precise color selection.
- After finalizing the color, you have two options:
- Tap on the “Apply” option to apply the setting.
- Select “Reset Background” to revert to the original background preferences.
- At the bottom of the right pane, you can either:
- Overwrite the original image with the edited version.
- Save the new image as a copy.
By following these steps, you can effectively utilize the Photos app on Windows 11 to remove and replace the background of your images.
Read This: 5 quality PUBG Mobile guns for beginners